코드는 Github 에 있습니다.
RestClient Spring Boot 3.2.x Release 된 서비스입니다.
RestClient 는 외부 서비스와 통신을 제공해주며, 기존의 WebClient 의 WebFlux에 대한 의존성에 대한 아쉬운점을 보안하여 나온 서비스 입니다.
지금까지 제가 아는 Spring 에서 제공해주는 HTTP 호출 도구는 아래의 흐름을 가집니다.
- RestTemplate (2009. Spring 3.0 - Deprecated)
- WebClient (2017. spring 5.0에 도입)
- RestClient (2024.10. spring 6.1, spring boot 3.2)
Spring 을 제외하고, HTTP 통신 라이브러리들은 아래와 같습니다.
- Apache HttpClient (2009)
- Netflix OpenFeign (2012)
- Square OkHttp (2013)
Spring RestClient 가 나오기전에는, 비동기 처리 방식인 WebFlux에 대한 부담감이 존재하기때문에 주로 `OpenFeign` 이나 `OkHttp` 라이브러리를 주로 사용해온 것으로 보여집니다.
하지만 Spring 에서 정식으로 동기식 호출도구이며 직관적인 RestClient 를 출시했기 때문에, 외부 라이브러리에 대한 의존성을 줄이는 방향이 아무래도 관리에 편하기 때문에 해당 기능에대해 공부해보고자 합니다.
[목차]
- RestClient 사용 방법
- 객체생성
- Get( ) / Post( ) 요청
- RestClient 에러 핸들링
- HTTP Interface 와 함께 사용하기
- HTTPInterface 란
- HTTPInterface 사용하기
1. RestClient 사용 방법
1) 객체생성
RestClient 인터페이스를 사용하여 생성할 수 있습니다.
SpringFramework 에서 지원하는 도구이기때문에 의존성을 추가할 필요가 없습니다.
import org.springframework.web.client.RestClient

class RestClientConfig {

    fun getRestClient(): RestClient {
        return RestClient.create()
    }

    fun getRestClient2(): RestClient {
        return RestClient.builder()
            .baseUrl("/")
            .build()
    }
}
2) Get( ) / Post( ) 요청
api 는 해당 사이트에서 제공해주는 더미 url 로 테스트하였습니다.
https://jsonplaceholder.typicode.com/
아래와 같이 직관적으로 외부 API를 호출 할 수 있습니다.
fun getApi() {
    val restClient = getRestClient()
    ResponseEntity result = restClient.get()
        .uri("https://jsonplaceholder.typicode.com/posts")
        .retrieve()
        .toEntity(String::class.java)

    println("Response status: " + result.statusCode)
    println("Response headers: " + result.headers)
    println("Contents: " + result.body)
}

//Json 객체 Mapping
val pet = restClient.get()
  .uri("https://petclinic.example.com/pets/{id}", id)
  .accept(APPLICATION_JSON)
  .retrieve()
  .body<Pet>()

//응답값이 존재하지 않을 때 ex) POST
val response = restClient.post()
  .uri("https://petclinic.example.com/pets/new")
  .contentType(APPLICATION_JSON)
  .body(pet)
  .retrieve()
  .toBodilessEntity()
3) RestClient 에러 핸들링
기본적으로 RestClement는 4xx 또는 5xx 상태 코드로 응답을 검색할 때 RestClementException의 하위 클래스를 실행합니다. 이 동작은 onStatus를 사용하여 재정의할 수 있습니다.
fun getApiError() {
    val restClient = getRestClient()

    //404
    val result = restClient.get()
        .uri("https://jsonplaceholder.typicode.com/donot")
        .retrieve()
        .onStatus(HttpStatusCode::is4xxClientError) { _, response ->
            throw RuntimeException(response.statusText)
        }
        .toEntity(String::class.java)

    println("Response status: " + result.statusCode)
    println("Response headers: " + result.headers)
    println("Contents: " + result.body)
}
RestClient Exchange
더 고급 시나리오의 경우, RestClient는 retrieve() 대신 사용할 수 있는 exchange() 메서드를 통해 기본 HTTP 요청 및 응답에 대한 액세스를 제공합니다.
exchange()를 사용할 때는 상태 처리기가 적용되지 않습니다. Exchange 함수에서 이미 전체 응답에 대한 액세스를 제공하므로 필요한 오류 처리를 수행할 수 있기 때문입니다.
fun getApiExchange() {
    val restClient = getRestClient()

    //404
    val result = restClient.get()
        .uri("https://jsonplaceholder.typicode.com/donot")
        .exchange { request, response ->
            if (response.getStatusCode().is4xxClientError()) {
                throw RuntimeException(response.statusText)
            } else {
                //return Custom Response Object
                val pet: Pet = convertResponse(response)
                pet
            }
        }
}
2. HTTP Interface 와 함께 사용하기
1) HTTPInterface 란
✔️ HttpInterface는 인터페이스 기반 선언형 API 입니다.
Spring 프레임워크에서는 @HttpExchange 메서드를 사용하여 HTTP 서비스를 Java 인터페이스로 정의할 수 있습니다.
이러한 인터페이스를 HttpServiceProxyFactory에 전달하여 RestClient 또는 WebClient와 같은 HTTP 클라이언트를 통해 요청을 수행하는 프록시를 생성할 수 있습니다. 서버 요청 처리를 위해 @Controller에서 인터페이스를 구현할 수도 있습니다.
👏 즉, 앞에서 본 RestClient 와 HTTP Interface 를 함께 사용하면 선언적 API의 간결함과 RestClient의 유연성을 모두 활용할 수 있습니다.
2) HTTPInterface 사용하기
- @HttpExchange 어노테이션을 명시한 Interface로 어떤 URL을 사용하여 통신할지 명시해줍니다.
- 현재까지는 Spring에서 실질적으로 HTTP 통신의 역할을 해줄 프록시객체 생성을 지원해주지 않기때문에, 통신 로직을 담당할 Proxy 객체를 직접 구현해 주어야 합니다.
⚙️ HttpInterface
@HttpExchange
interface DemoHttpInterface {
    @GetExchange("/posts")
    fun getPosts()
}

// GetExchange..
@Target(ElementType.METHOD)
@Retention(RetentionPolicy.RUNTIME)
@Documented
@HttpExchange(method = "GET")
public @interface GetExchange {
...
}
⚙️ Proxy 객체 Bean 등록
@Component
class DemoHttpInterfaceProxy {
    @Bean
    fun restClient(): RestClient =
        RestClient
            .builder()
            .baseUrl("https://jsonplaceholder.typicode.com")
            .defaultHeaders { headers ->
                headers.contentType = MediaType.APPLICATION_JSON
                headers.accept = listOf(MediaType.APPLICATION_JSON)
                headers.setBasicAuth("jwt-token")
            }.build()

    @Bean
    fun demoHttpInterface(
        @Qualifier("restClient") restClient: RestClient,
    ): DemoHttpInterface {
        val adapter = RestClientAdapter.create(restClient)
        val factory = HttpServiceProxyFactory.builderFor(adapter).build()

        return factory.createClient(DemoHttpInterface::class.java)
    }
}
⚙️ Test
@SpringBootTest
class HttpInterfaceTest(
@Autowired
var demoHttpInterface: DemoHttpInterface,
) {
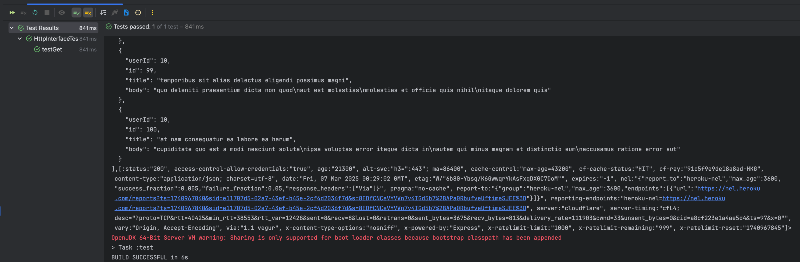
@Test
fun testGet() {
val posts = demoHttpInterface.getPosts()
println(posts)
}
}
이렇게하면 HTTPInterface 로 통신할 서비스를 명시적으로 선언 및 관리하고, 각각의 Proxy 객체를 통신 서비스(도메인)의 성격에 맞게 핸들링할 수 있습니다.
코드 단위에서 서비스 통신 리소스와 통신 구현부를 명시적으로 분리 및 관리할 수 있으므로 유지보수의 관점에서 유용한 도구가 되지않을까 싶습니다. ☺️
간만에 끝!
[Spring Boot]
👏 RestClient 와 HTTPInterface
참고
'Spring > Spring Boot' 카테고리의 다른 글
| Spring Bean 공부하기 (Been 생명주기, Scope, 권장 사용 방법) (0) | 2025.01.29 |
|---|---|
| [Spring Boot] 다중 인스턴스에서 스케줄링 중복 실행 제어 하기 (@Scheduled Lock - shed lock) (0) | 2024.10.10 |
| 동시성 제어 문제에 대한 고찰 (With. Spring, JAVA, MySQL, Redis, Kafka) (0) | 2024.08.30 |
| Repository는 어느 모듈에 위치해야할까? (DIP. 고수준모듈, 저수준 모듈) (4) | 2024.07.09 |
| Spring Boot 에서 Redis Cache 사용하기 (2) | 2024.07.02 |